
ACEnano Knowledge Warehouse manual
Table of contents
6. How to create a new data workflow?
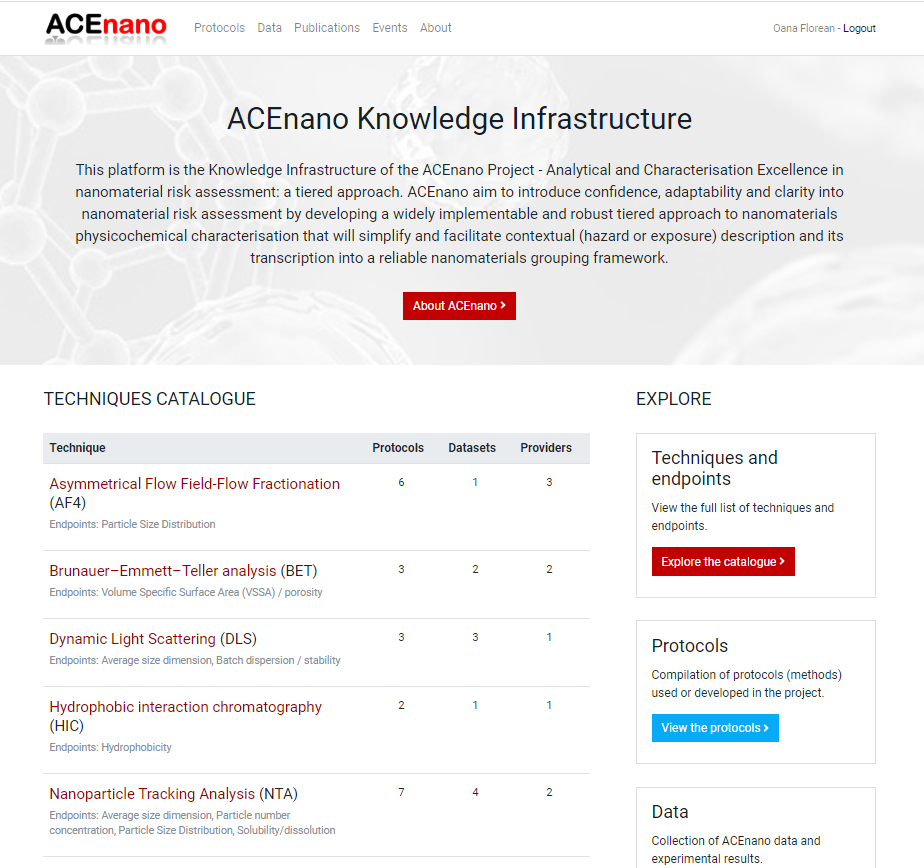
The data warehouse offers long-term storage of data produced by the nanosafety community. The data warehouse aims to support the data harmonisation and the implementation of FAIR principles towards the goal of generating a reference resource for nanomaterials risk assessment. To achieve this goal, the user can select any of the data on samples and methods added into the protocols database, create and save the full workflow applied for the nanomaterials characterisation and link with the measurement results. This facilitates the tracking of results to the methodology, comparison of methods and results between different users or laboratories, support the round-robin experiments for method benchmarking and finally document all steps performed on a sample from the identification to the final results.
After logging on at https://acenano.douglasconnect.com/ you can add a new dataset by following these steps:
-
Click the Data button from the top menu to open the ACEnano Data page.
-
On ACEnano Data page, find the red button Add a dataset between the explanatory paragraph and the list of datasets.

-
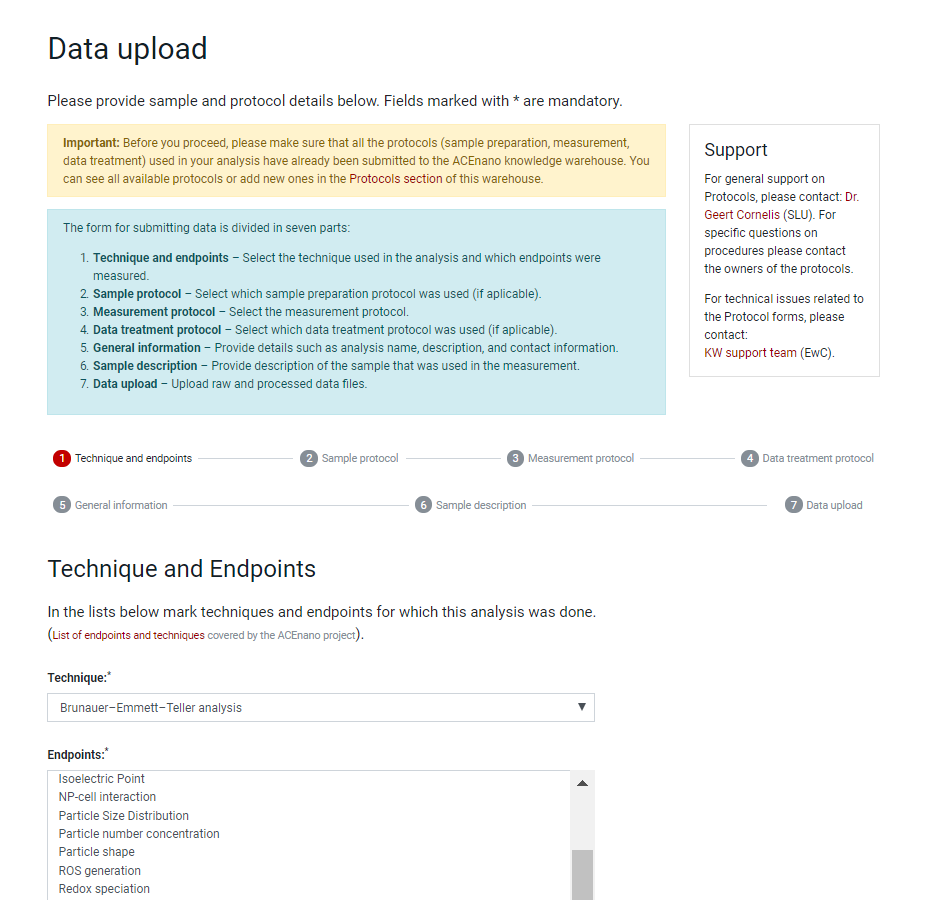
Click the button Add a dataset to be redirected to the Data Upload page and read the guidelines on completing the steps needed for dataset addition.
-
On Data Upload page, in the Technique dropdown list and Endpoints the list box choose multiple selections at a time by holding Ctrl.
-
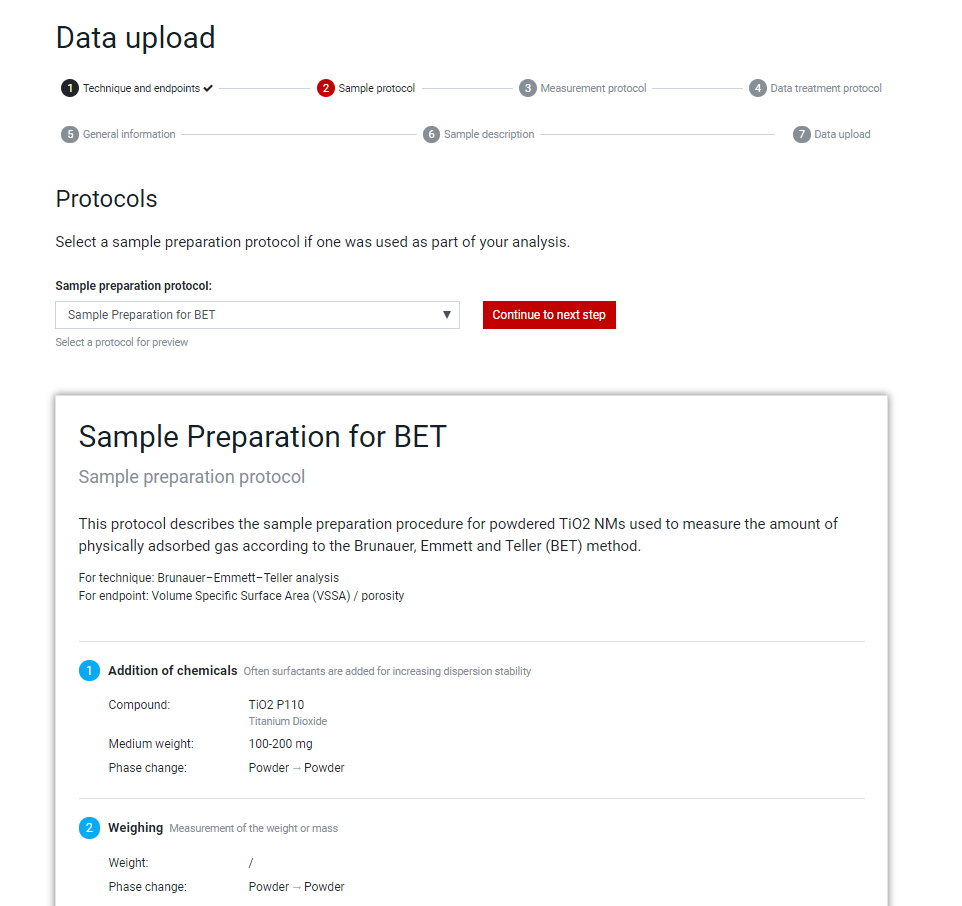
Press the red bottom Continue to next step to arrive at Sample Protocol, Measurement Protocol andData Treatment Protocol pages in which, in each, choose the protocol based on which the data was obtained.
-
In the General information page, complete with free text the Analysis name,Brief description,Long description,References fields, and choose the Confidentiality and License from the dropdown lists.
-
In the Sample Description page, in the Sample area, complete the Name, Code, Supplier, Batch number with free text and choose the sample phase, and Medium from the dropdown lists. If the medium you need doesn’t exist in the list, press the +Add a new medium button and complete with details the pop-up formular. Compleat with free text the Sample volume, Volume units, Sample weight, Weight units, Concentration of material in sample, Concentration units fields. Continue completing with free text in the Nanoparticles in sample area, the Name,CAS number,Coating,Crystalline phase,Shape,Size,Size units,Surface area,Surface area units,Coating thickness,Units fields. Delete an undesired nanoparticle by checking the box Delete this nanoparticle or add a new nanoparticle by pressing +Add a nanoparticle.
-
In the Data file page, choose the type of data from the dropdown list, then write its name and upload it by pressing the Choose file button. Delete an undesired dataset by checking the box Delete this dataset or a add a new dataset by pressing +Add dataset.
Currently a maximum size of 100 MB per file is accepted for upload.
-
Press the Submit your data button to commit your dataset to the data warehouse.
-
During the upload process, the data files are automatically transferred to EdelweissData. The uploaded files supported by EdelweissData are case-specific. The system recognises the specific NanoSight data files(.csv).