
ACEnano Knowledge Warehouse manual
Table of contents
5. How to add a new protocol?
The protocols database facilitates the access and sharing of methodologies applied in nanosafety. The methods are easy to browse and are linked to experimental datasets. This tool aims also to facilitate sharing of state of the art methods with the NanoEHS community and beyond.
After logging on at https://acenano.douglasconnect.com/ you can add a new protocol by following these steps:
- Click the Protocols button from the top menu to open the ACEnano Protocols page.
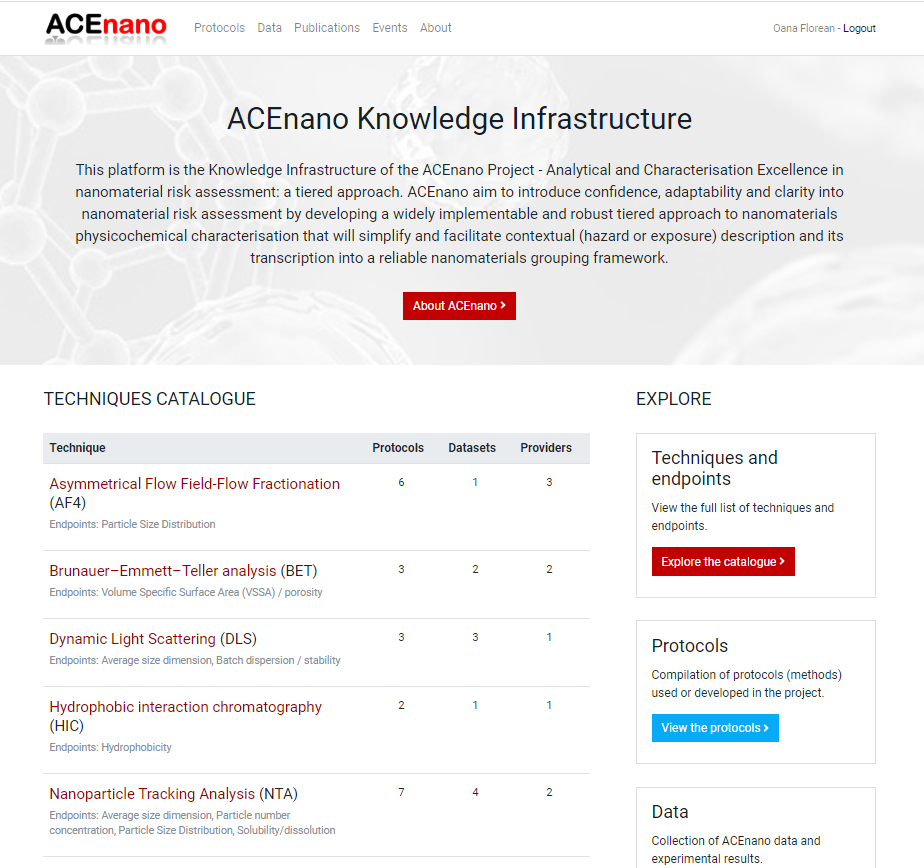
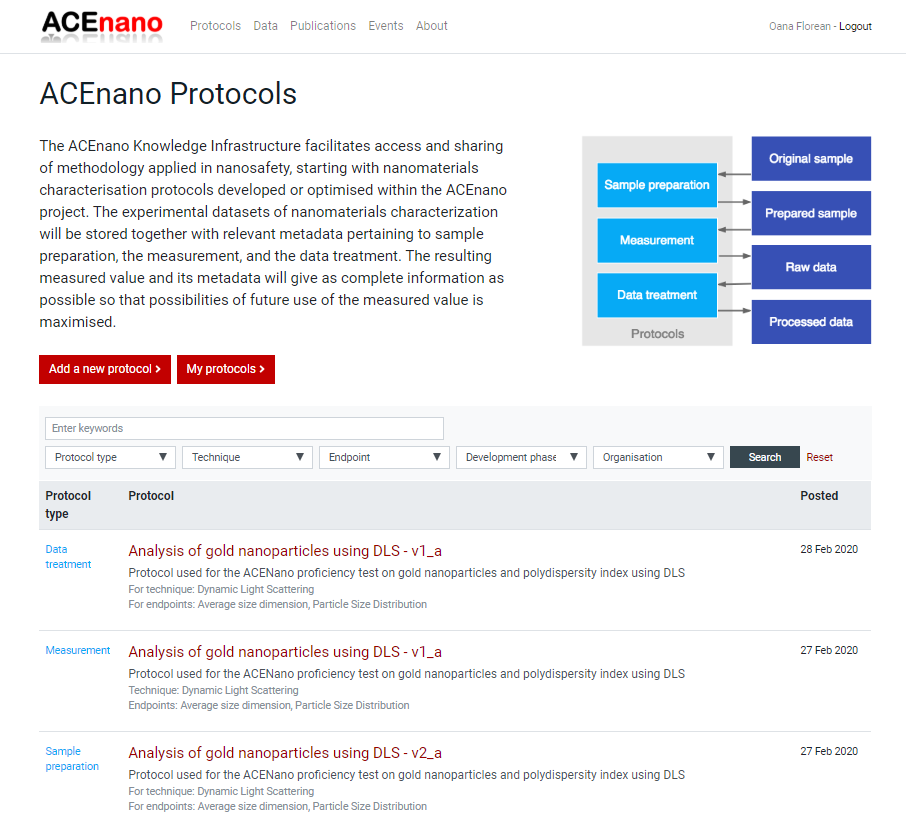
- On ACEnano Protocols page, find the red button Add a new protocol between the explanatory paragraph and the list of protocols.
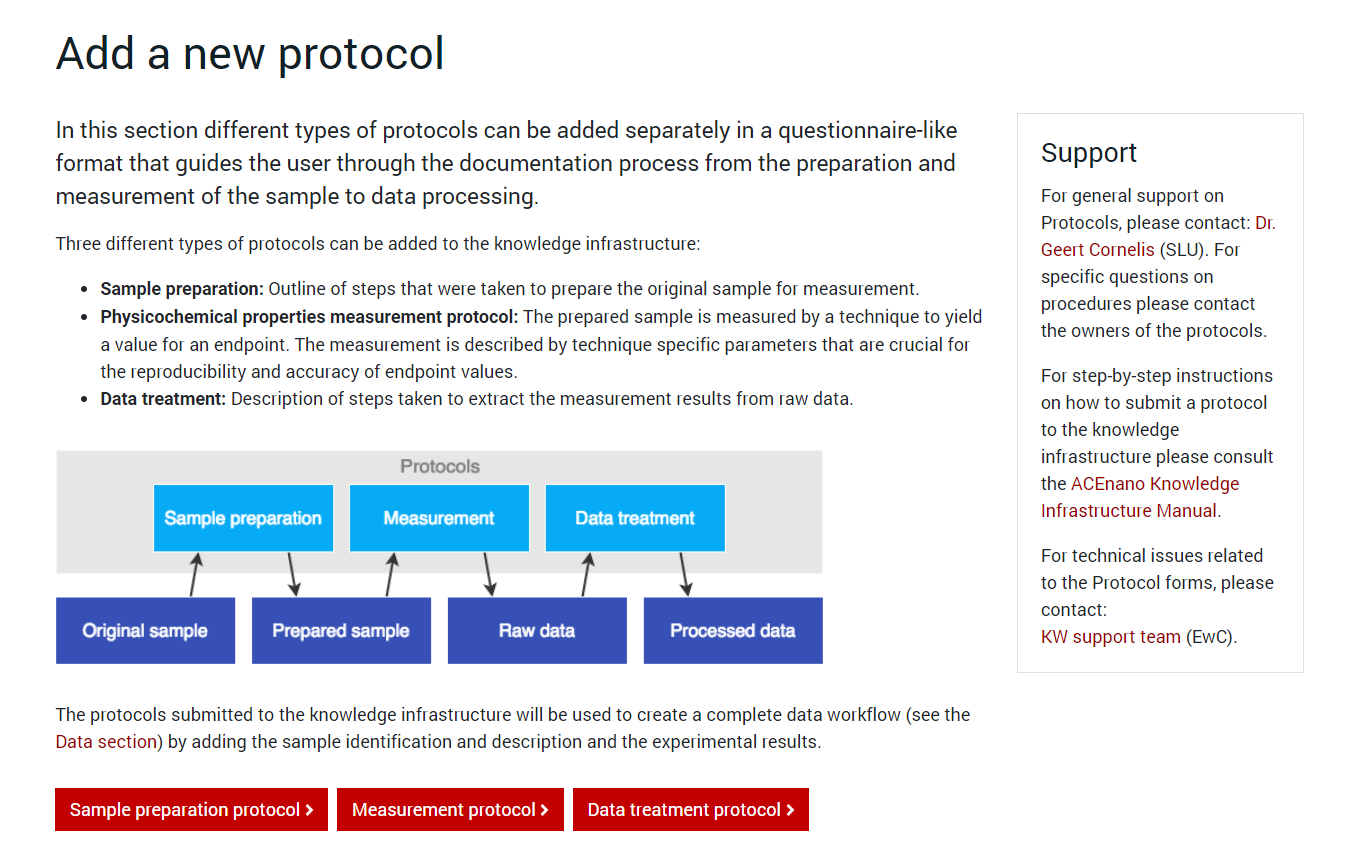
- Click the button Add a new protocol to be redirected to the page containing the description of the protocol types and the red buttons Sample Preparation Protocol, Measurement Protocol, Data Treatment Protocol.
-
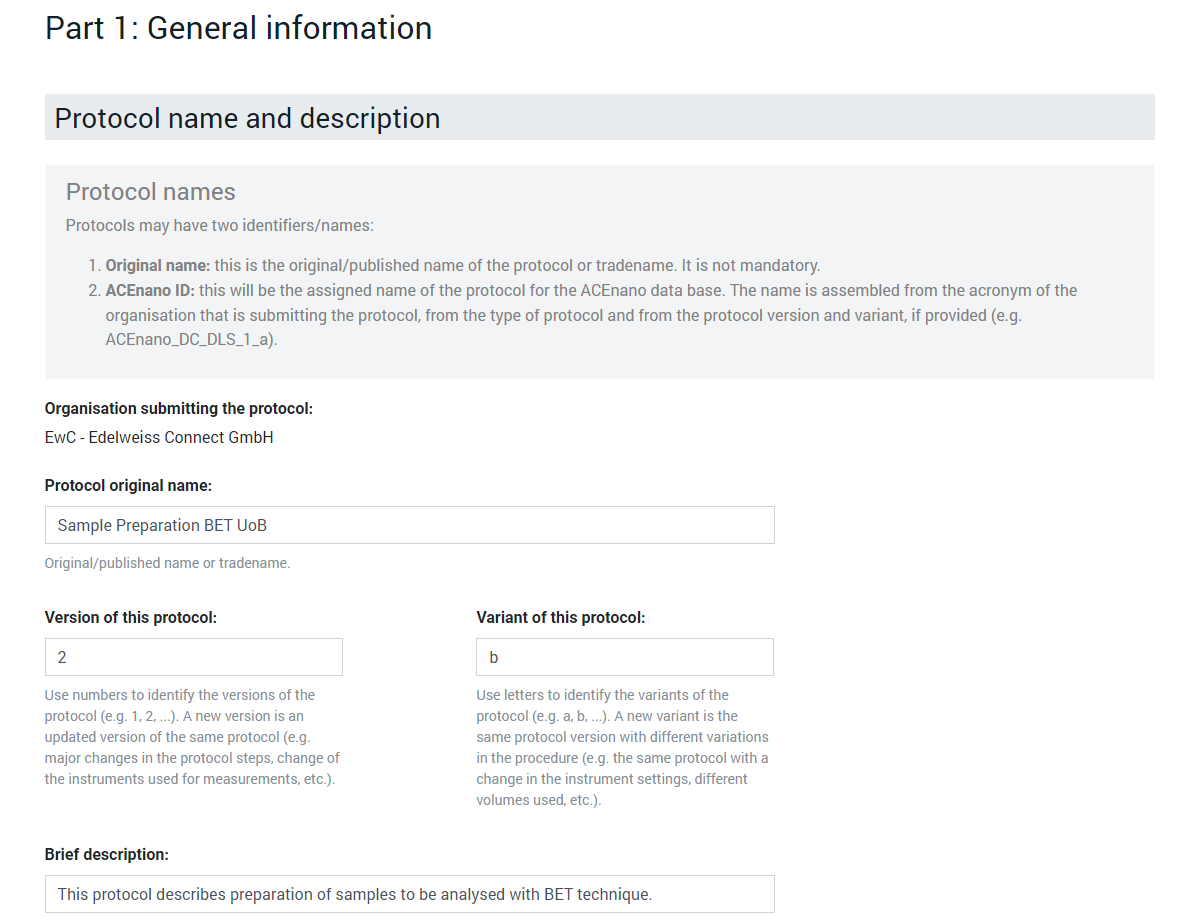
Press the red button named as the desired protocol type and arrive at its specific formular to complete. Regardless of the protocol type you choose to add, the first page of the protocol is approximately the same. It contains an explanation of the protocol parts and the questionnaire on Part 1: General information:
-
In the Protocol name and description area, complete the Protocol original name, Version of this protocol, Variant of this protocol, Brief description, Long description, References fields with free text and click the dropdown lists Development phase, Confidentiality, License to choose an exclusive item.
-
In the Contacts area, complete the Name and email of contact person for the protocols fields with free text.
-
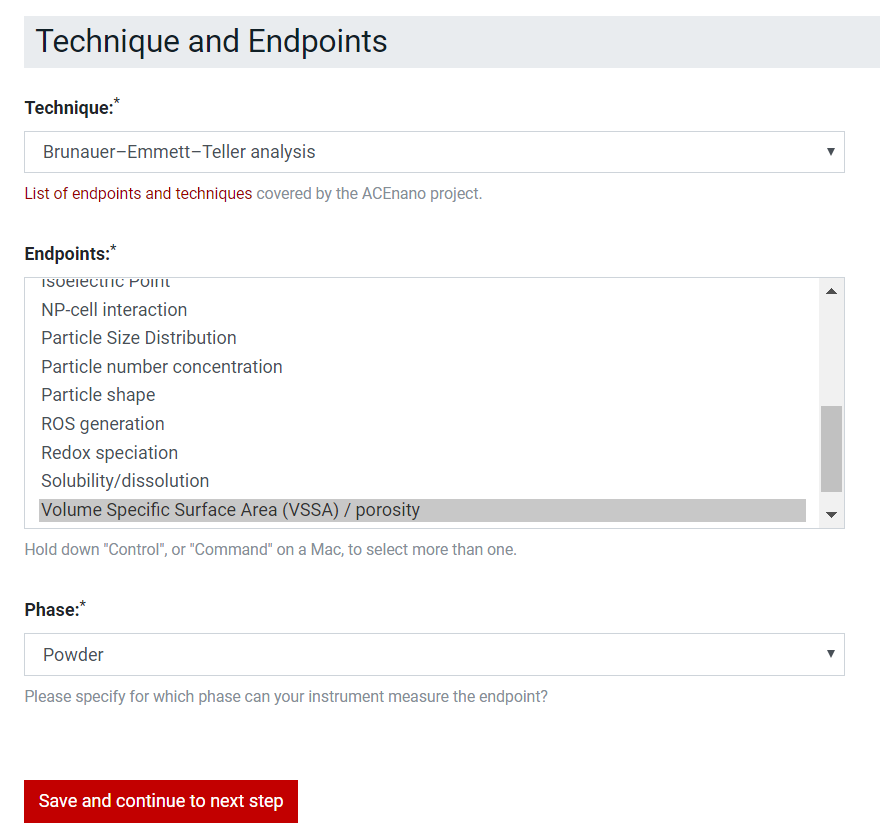
In the Technique and Endpoints area, which is different for each protocol types:
-
For Sample Preparation Protocol, select in the Technique and Endpoints list boxes multiple options at a time by holding Ctrl.
-
For the Measurement Protocol, select in the Technique and Phase dropdown lists only one options and select in Endpoints list box multiple options at a time by holding Ctrl.
-
For the Data Treatment Protocol, this part doesn’t exist.
-
-
-
Press the red bottom Save and continue to next step at the end of the first page, to arrive at the more specific part of each protocol type:
-
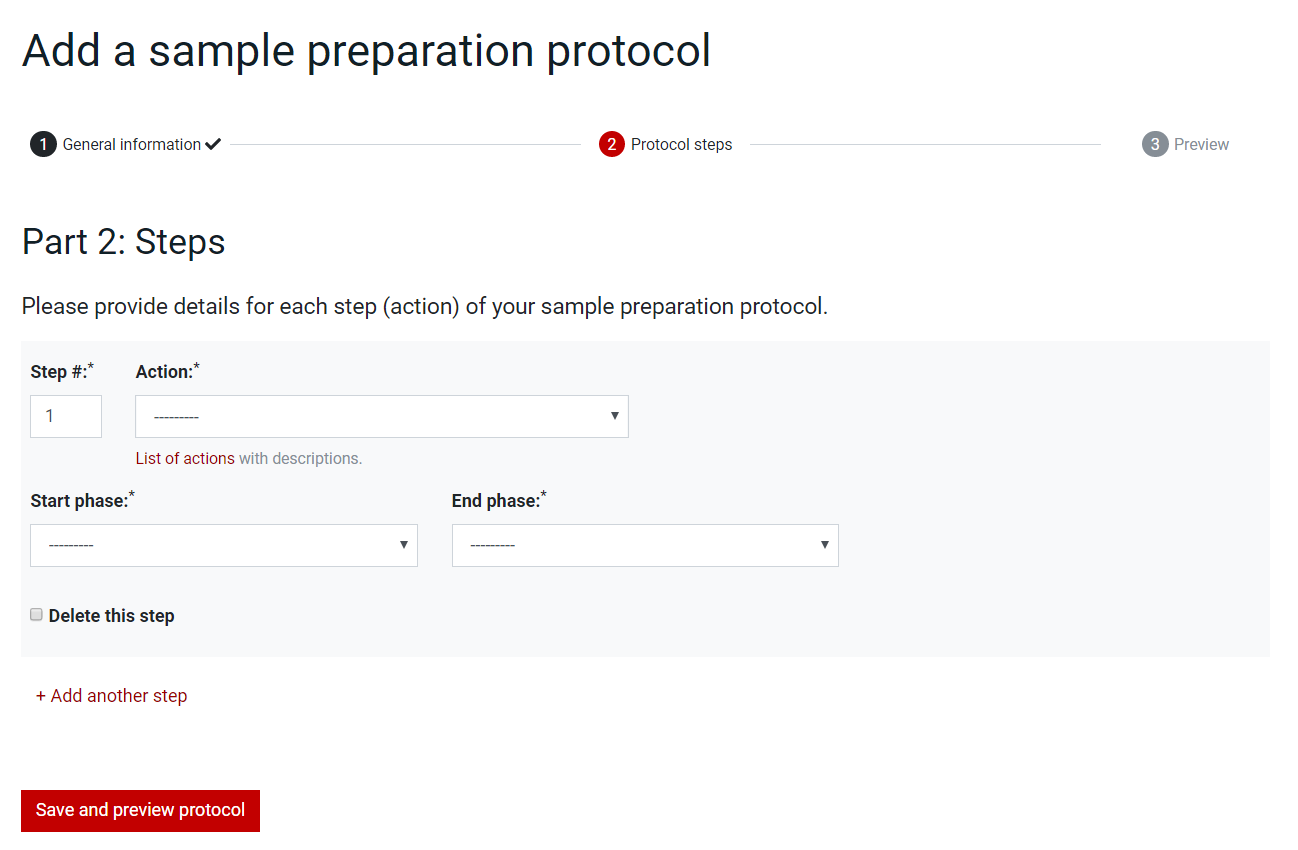
For the Sample Preparation Protocol, in the second page, Part 2: Steps, add one by one the steps of the protocol by choosing the number in the Step box, the action in the Actions dropdown list and the phases in the Start Phase and End Phase dropdown lists. Steps can be deleted by selecting the checkbox Delete this step and extended by pressing the +Add another step button.
-
For the Measurement Protocol:
- In the second page, Part 2: Equipment, complete with free text in the:
- Equipment area, the Name, Model, Instrument type, Limit of detection upper, Limit of detection lower, Limit of detection unit, Instrument settings and parameters fields;
- Possible datasets area, the Axe, Units fields;
- Measurement quality parameters area, Parameter, Common setting and Units fields.
In each of these areas, the fields can be deleted by checking the delete boxes or extended by clicking the addition button.
-
Click the red button Save and continue to the next step to arrive at the third page, Part 3: Steps where the steps can be added one by one.
- Set the number in the Step number box, and complete with free text the Name and Description fields. Optionally, upload an image via Chose file button in the Image box. Deleted undesired steps by selecting the checkbox Delete this step and extend the steps by pressing the +Add another step button.
- In the second page, Part 2: Equipment, complete with free text in the:
-
For Data Treatment Protocol, in the second page, Part 2: Steps, add steps one by one by setting the number in the Step number box, and complete with free text the Algorithm applied, Resulting data and Parameters fields. Delete undesired steps by selecting the checkbox Delete this step and extend the Steps by pressing the +Add another step button.
-
-
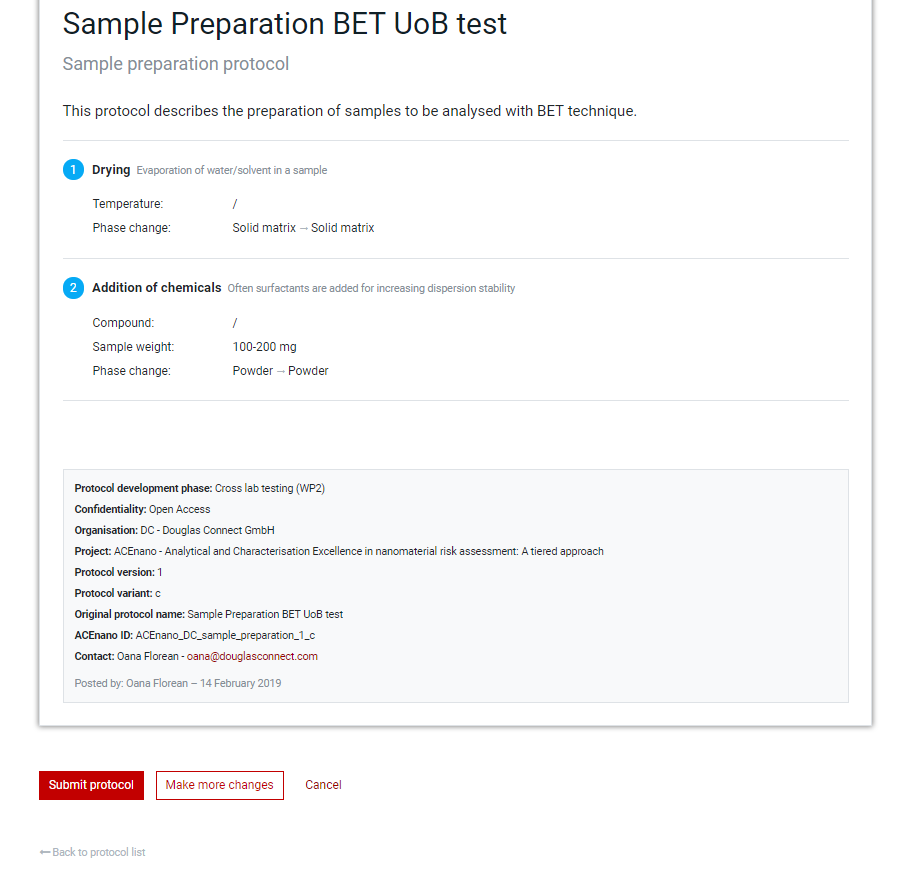
Click the red Save and preview protocol button at the bottom of the last page of the protocol questionnaire (second page for Sample Preparation Protocol and Data Treatment Protocol and third page for the Measurement Protocol) to arrive at the page containing the Preview protocol allowing to proofread the protocol before submission.
-
When everything it’s alright, commit the protocol by pressing the Submit protocol button. If corrections/modifications are needed, press the Make more changes button and edit any part, area or field of the protocol by passing through pages from Part 1: General information and moving towards the Preview protocol page.
-
Assuming that the protocol was submitted and the admin accepted it, the protocol will appear on top of the LATEST POSTS list with the flag protocol, together with its description and the type of the protocol and the date when it was published.
-
In case the protocol was not submitted yet, or it was submitted but was rejected by the admin, or its verification is in progress, the protocol will be saved as it is and can be seen in the My Protocols section. This section can be accesed through the ACEnano Protocols page, by pressing the button My Protocols, found near the Add a new protocol button.
-
For the protocols which were not submitted, you can still continue to complete or edit the saved draft, finish and submit it from My Protocols at any time. Note that members of ACEnano project can see all draft protocols added by anyone in their organization, so anyone can continue editing, while for external user (non-ACEnano member), you see only your own draft protocols.
- The protocols license can be changed, even if the protocol was submitted and accepted, by creating new copies or modifying the confidentiality/license information (e.g. in case you want to change the status from ‘restricted’ to ‘open access’ at any time after they were submitted to the database).